
Here is a typical connection diagram used for the TOGGLE ROOMS device in a videoconferencing setup when embedding the button on table. The button acts as a trigger to enable laptop/BYOM mode for TOGGLE ROOMS.

Installation steps
What you’ll need for the installation:
- INO – Host button kit including:
- 1x Button with assembled cable with screw and nut hardware
- 1x Terminal block plug
- 1x Installation Guide
- INOGENI TOGGLE ROOMS
- 57mm [2 ¼ in] hole saw with drilling kit
- Flat screwdriver
- Category (CAT) cable with the length needed
Here are the instructions for the installation:
- Drill a 2 ¼ in [57 mm] hole into the table using the appropriate hole saw. You can then mount the screw through the table. Screw the nut under the table counterclockwise.

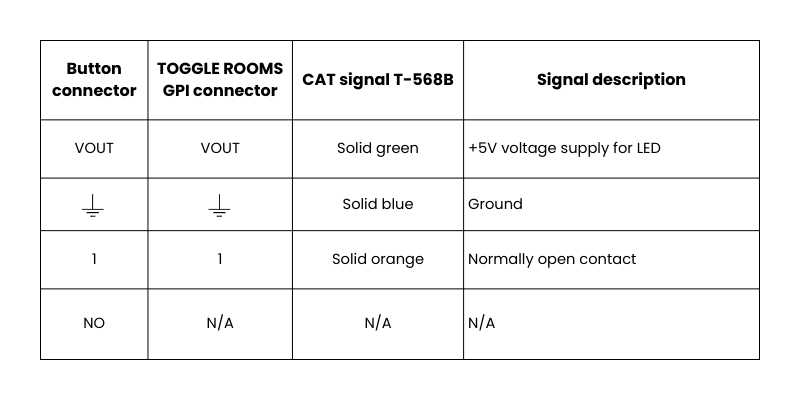
- Use a CAT cable with the appropriate length and connect the terminal block to the CAT conductors according to the TOGGLE ROOMS GPI connection. Here is a recommended connection using the T-568B standard with a CAT cable.
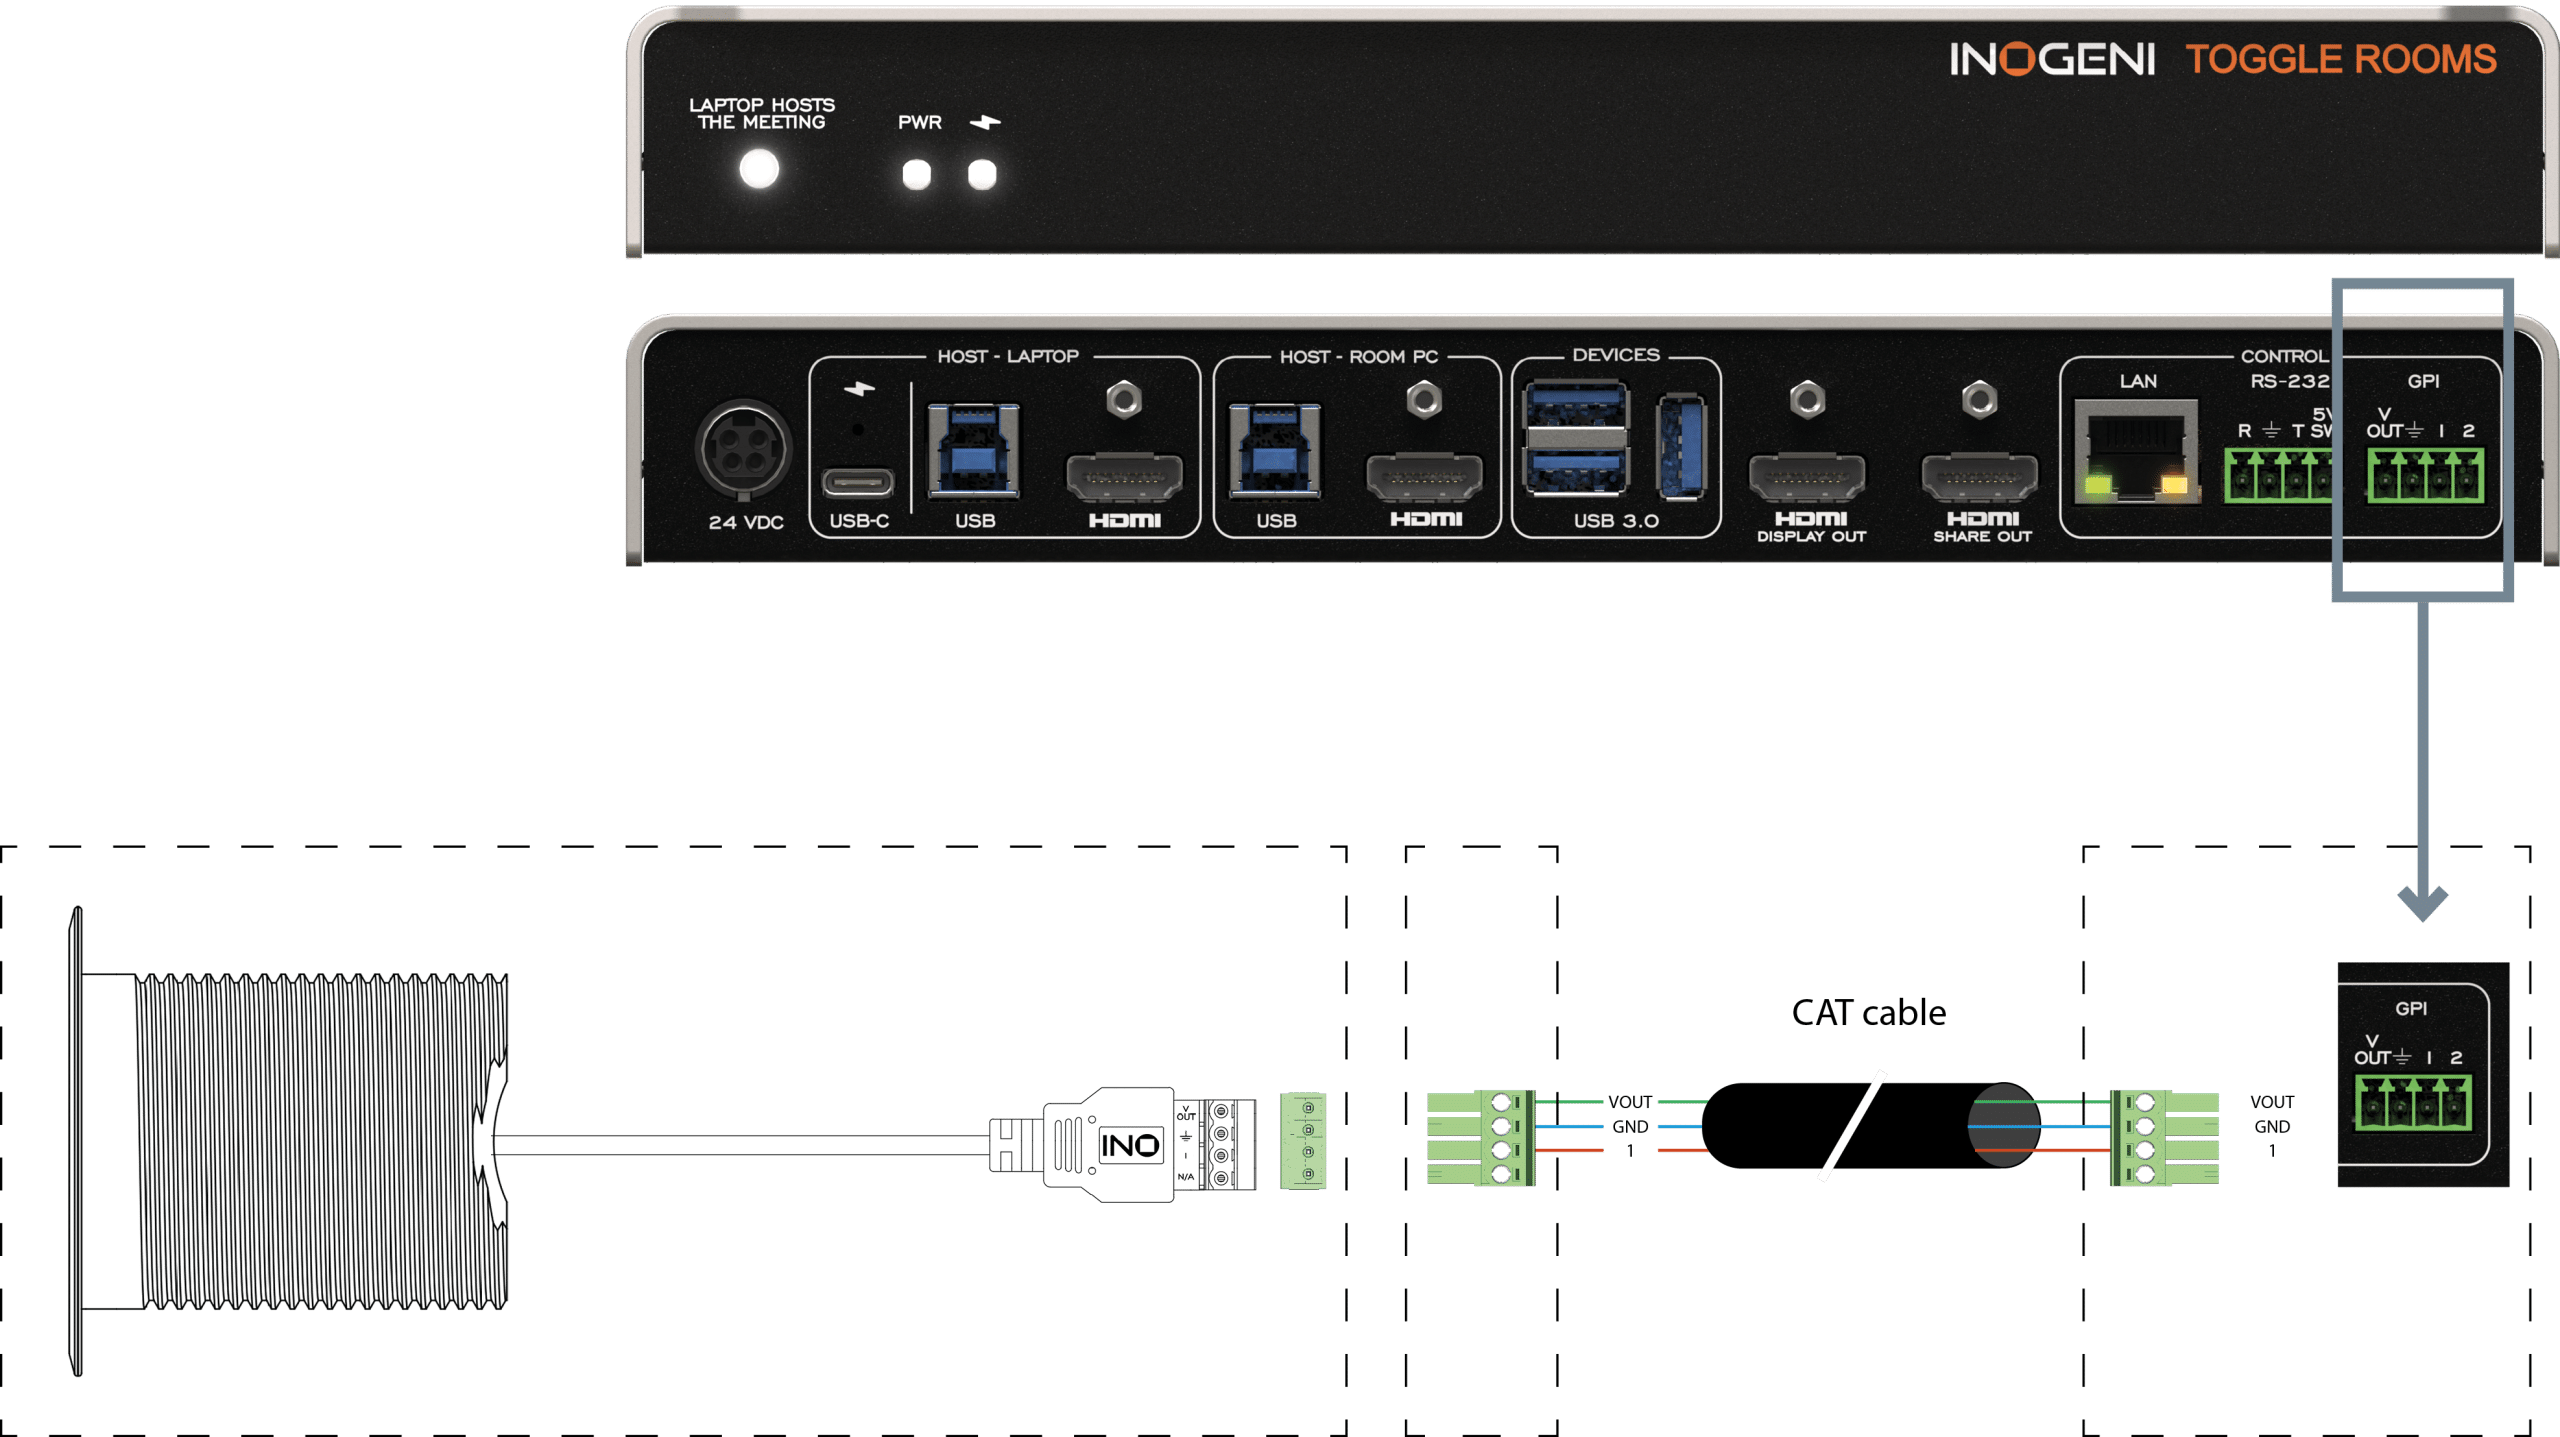
- Connect both terminal block connectors to the button cable and the TOGGLE ROOMS GPI interface.
- To verify if the connection is successful, you can click on the button to switch the host connection. The button will with light up to indicate that the TOGGLE ROOMS selected the laptop connection.
Button and led behavior
When the user presses the button, it will request the TOGGLE ROOMS to change the current mode. The button has an integrated LED and will light up when laptop is selected.


